Introduction to Yam Farming
Yams are important starchy tuber crops grown widely in tropical regions. They are a staple food and significant source of carbohydrates, fiber, vitamins, and minerals.
Yam farming provides income, supports food security, and serves as raw material for flour, chips, and starch production.
Success requires proper site selection, high-quality seed yams, soil fertility management, and careful harvesting for high yields and tuber quality.
Processed yams create value-added products, expanding economic potential for farmers. Intercrop rotation with sweet potatoes or cassava helps reduce pests and maintain soil fertility.
1. Site Selection and Soil Preparation
Yams grow best on well-drained loamy or sandy loam soils with pH 5.5–6.5. Avoid heavy clay soils.
Full sunlight and good air circulation reduce fungal infection risks.
Plow and harrow to 25–30 cm depth, incorporate compost or manure to improve fertility.
Form mounds or ridges 30–40 cm high to facilitate tuber growth and improve drainage.
2. Seed Yam Preparation and Planting
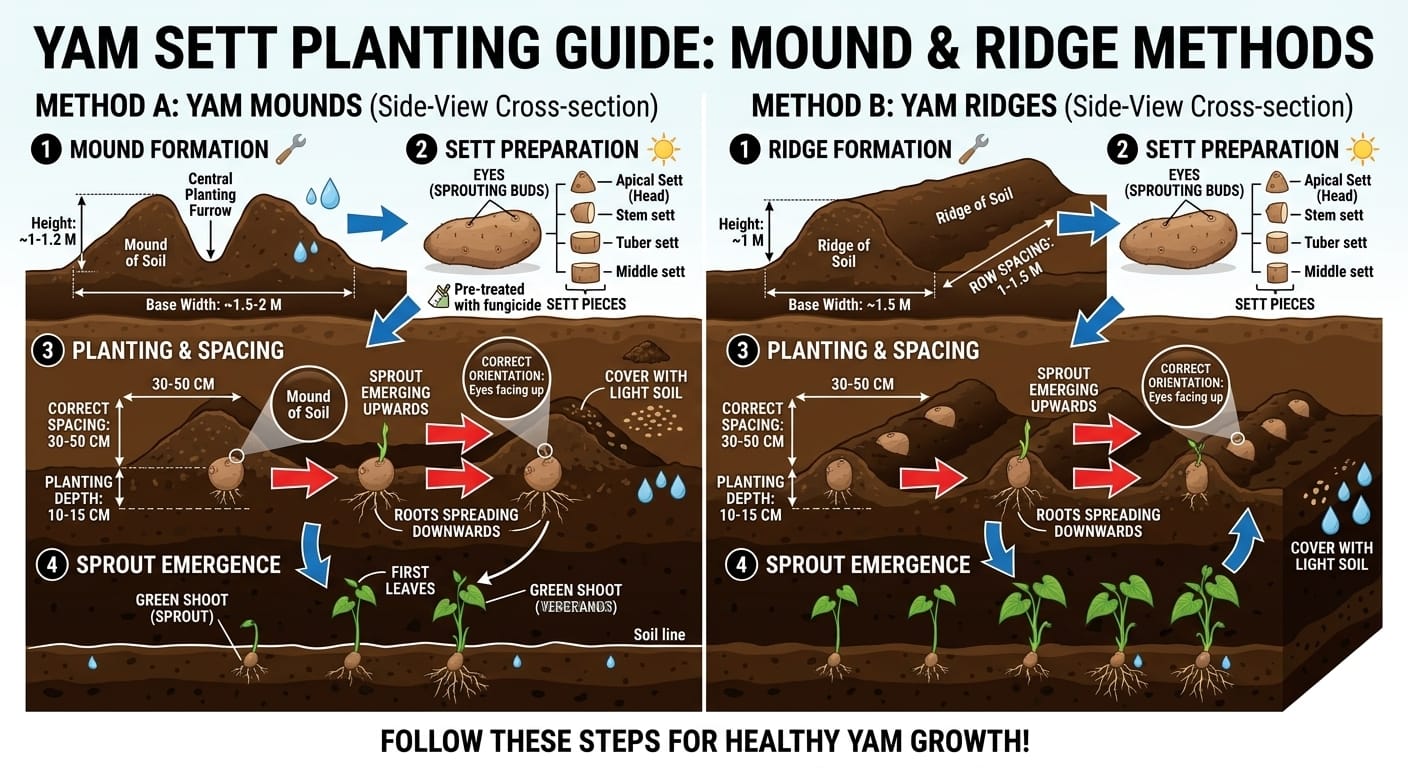
Select disease-free tubers. Cut large tubers into 200–300 g pieces, each with at least one healthy bud.
Allow pieces to dry/curing for 2–3 days before planting.
Plant on ridges or mounds, spacing 1–1.5 m between plants and 1.5–2 m between rows.
Plant at rainy season start or irrigate to ensure proper establishment.
3. Fertilization and Irrigation
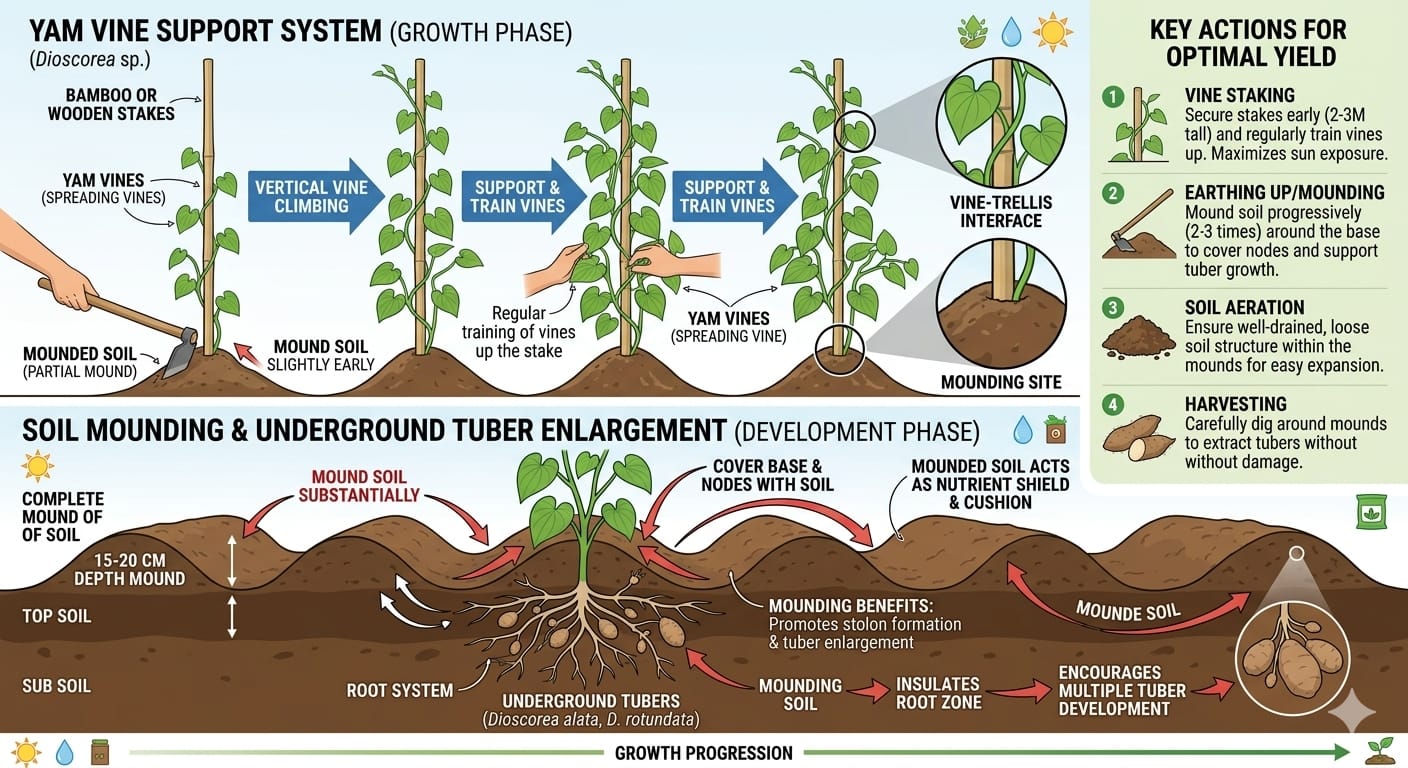
Apply moderate nitrogen, phosphorus, and potassium based on soil test.
Incorporate organic fertilizers during land prep; supplement early growth if needed.
Water regularly during first 6–8 weeks and dry spells, avoid waterlogging.
Mulching conserves moisture, suppresses weeds, and maintains soil temperature.
4. Pest and Disease Management
Common pests: yam beetles, nematodes, tuber moths.
Common diseases: yam mosaic virus, anthracnose, soft rot.
Use IPM: resistant varieties, crop rotation, sanitation, removal of infected plants.
Monitor fields for early detection and timely intervention.
5. Harvesting
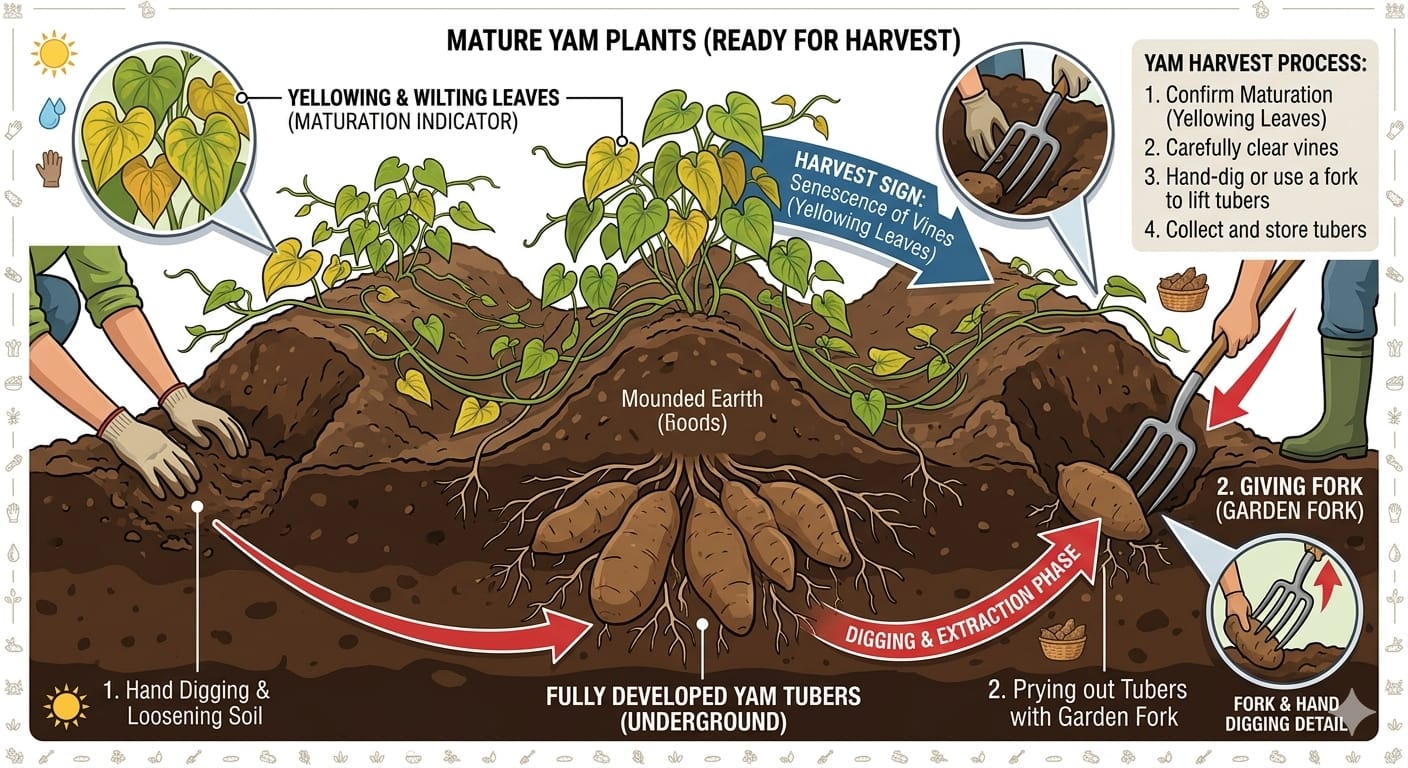
Harvest 8–12 months after planting depending on variety.
Use hand tools/forks to prevent tuber damage.
Sort and grade for market or seed purposes.
Early harvest yields smaller tubers for fresh consumption; late harvest produces larger tubers for processing.
6. Post-Harvest Handling and Storage
Handle tubers carefully to prevent bruising and damage.
Store in cool, ventilated, shaded areas; avoid sunlight and high humidity.
Processing into flour, chips, or paste extends shelf life.
Proper post-harvest management reduces losses and preserves quality.
7. Uses of Yams
- Direct consumption: boiled, roasted, baked, or fried
- Processing: yam flour, chips, starch for food & industrial use
- Seed tubers for propagation
- Income generation through local and export markets